

Menu options
Menu Options
Click this icon in the structure tab  to manage Menu boxes options.
You have created "menu" boxes in the "Menu boxes section". A number of articles titles and internal as well as external links are stored there; visitors will click them to go to your contents.
The management of menu options is of interest for:
- create this menu option later, for example if you forgot to select a menu box,
- change the title of the option of a menu option,
- make an item accessible in another menu, in addition to the one where it was declared when it was created
- reserve a menu option for a private group
Reminder: The menu option of an item is automatically created when a new item is published, if you select a menu box in the Menu box field before saving. This is the easiest way to create a menu option !!!
These articles are written in the articles section of the "Data Administration" tab. They are arranged in a list and an ID number is assigned to them. The item with ID 136 with 0 is "Out of Menu Box", the other items each have a menu option.

Creating a menu option
It is in this part of the administration that you assign to your menu boxes this or that item or internal or external link.
A page is displayed with a drop-down menu to select the menu box to which you wish to assign options (to put links to your articles for example).
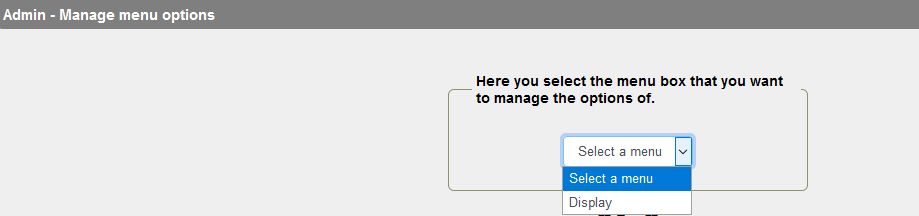
Once menu box has been selected, access to the page that allows:
- Seeing options already created for that menu box (suxh as titles, contents, articles, news...)
- Creating new menu options
- Go back to selecting another menu box
- When options already exist:
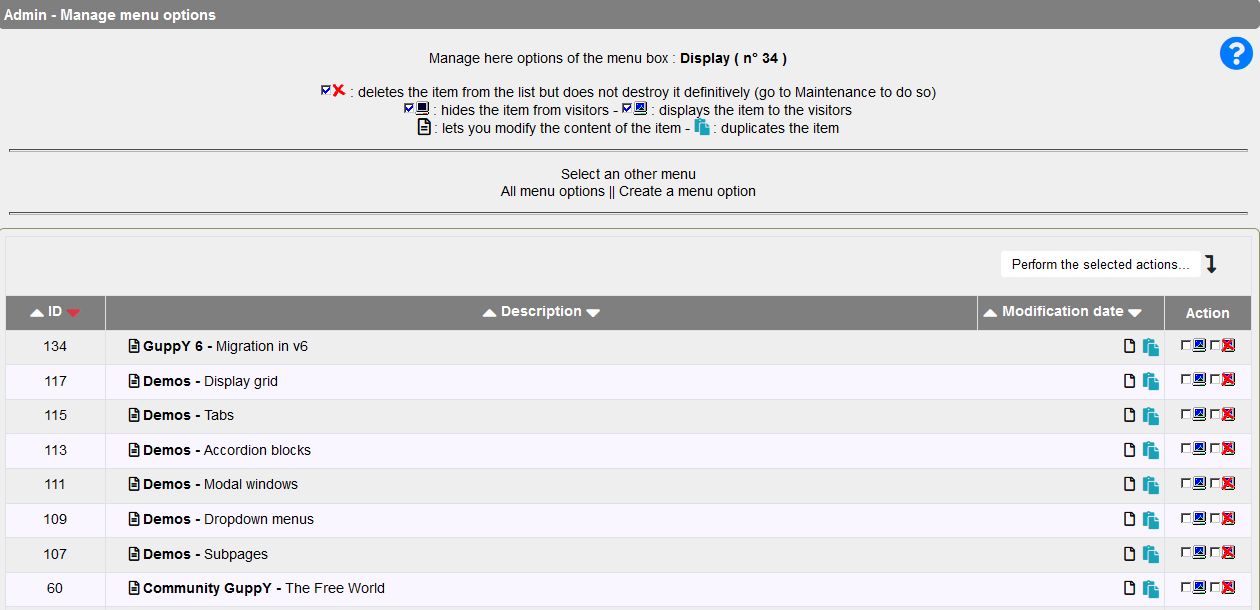
- Edit the article - Duplicate the article - display or not the item (that is the link to the article) in the menu box - Delete the item for this l'article (not the article!) of this menu box.
Way to proceed:
For instance, an article names Migration in v6 has been created, with ID 136.
We want to make it available in the menu box Introduction. We will then create a new menu option for the box Introduction.
- Select menu box Introduction. You get to the page with the options for the box Introduction (name of box showing at the top):
- Click "Create a menu option"
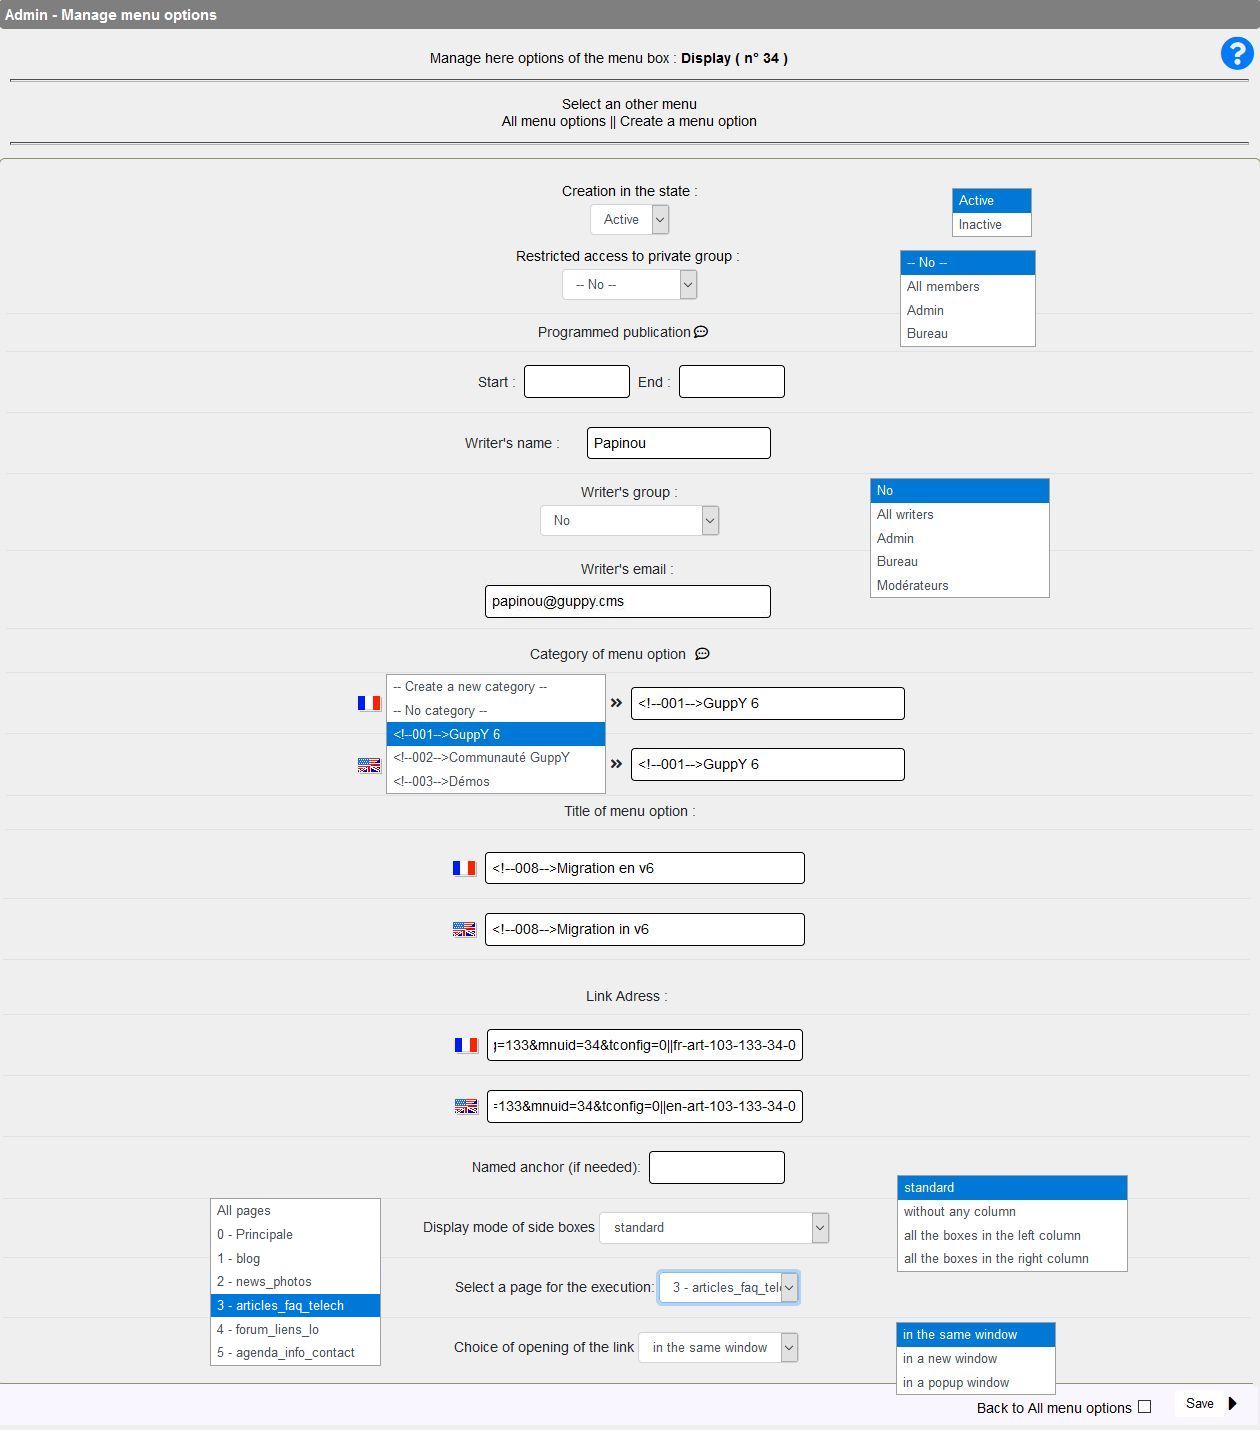
- The various fields of the above page allow to:
- Specify state of menu option:
- active, it will then be displayed in the Introduction box.
- Inactive : It can't be displayed on the site as is. make this choice for instance when you're working on articles that will be listed in a new menu box that you don't want to show now.
- Restrict access or not to a private group. You may thus allow access to this option only to people belonging to a group you will have previously constituted in "General Management > Group Management"
- Program the publication of the option. Date of start OR date of end in format YYYYMMDDhhmnmn (Year, Month, Day, hour and minutes)
- Then enter the writer's name and their email address in the provided field.
- Name a new category. Here: <!--001-->GuppY 6 (Idem in English, if this second language has been activated in General Config.
- Enter the title of the menu option. It is this title or name of item that will show in the menu box.
- Enter the url of the link to access the article.The title of name of the item will show as a link to access the article : Migration in v6: articles.php?lng=en&pg=136
- 136 is the ID of the article.
- Choose display of side boxes if you wish Standard is the default choice.
- Choose a page configuration for this option. Default: 3 - articles_faq_telech. This corresponds to the secondary pages created in the demo database.
Note : secondary pages areto be created in Boxes Config; they let you propose extra contents with making display uncomfortable in the side column of you sides.. - Choose opening mode of the page in your browser : default is "in the same window".
When you are done, don't forhet to click... SAVE !!!


