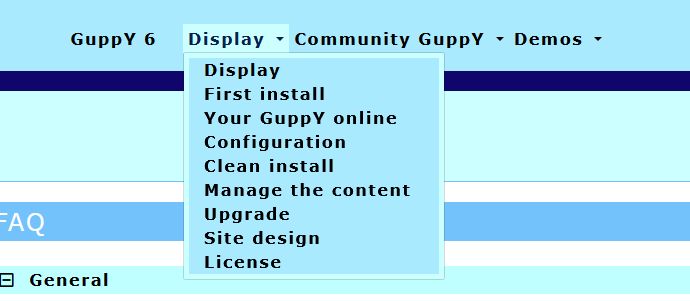
Dropdown menus options
Options of the dropdown menus
A click on, in the Structure tab  will take you to the configuration page of the options for dropdown menus boxes.
The dropdown menu boxes that you have created in the "dropdown menu boxes" section, are intended to put together a number of menus and sub-menus which visitors can click to have access to your contents. In the three proposed menus, we have made an ordering of categories, links, which allows you to insert categories, spaced links (020, 030, 040) without having to redo the whole menu.
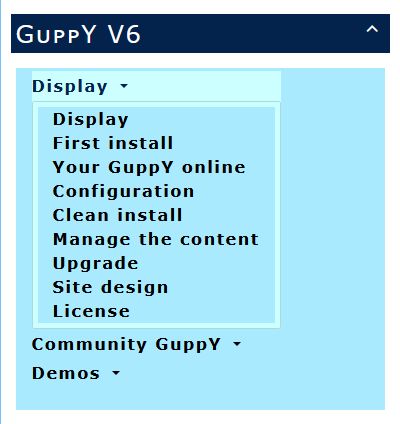
Below is an example of a horizontal drop-down menu with 3 categories :
There are three categories in this menu: Presentation, GuppY Community and Demos, the small down arrow indicating a content. Then a click on a link displays the content of the link.
This example is that of the demo database included in the GuppY 6 pack, here are the menu options :
For the vertical drop-down menu, the menu options are the same as for the horizontal pull-down menu, only the display changes.
Always the three categories in vertical presentation, one click on a category to see the links and then on a link to see the content.
A variant with a sub-category that will work with the horizontal drop-down menu and the vertical drop-down menu:
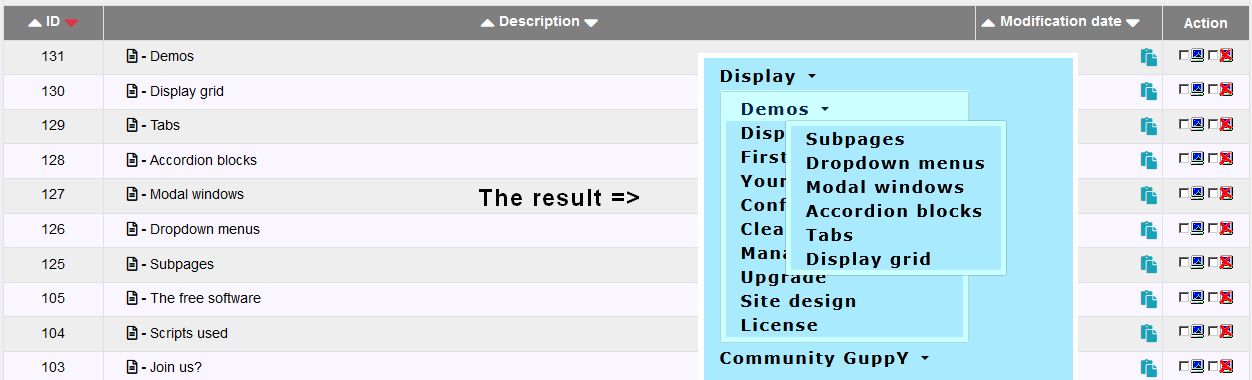
On this screenshot, you will notice that Demos has become a sub-category of Presentation, with the small arrow pointing to content and the new window with the links.
For the linear drop-down menu, the menu options of the demo base :

We have 4 categories for the linear drop-down menu with this display:
To reproduce this positioning, the easiest way is to copy/paste the source code from the Help category and adapt it to your needs.
The advantage is that this positioning is totally responsive on all screen sizes. On smartphones the images will be vertical.
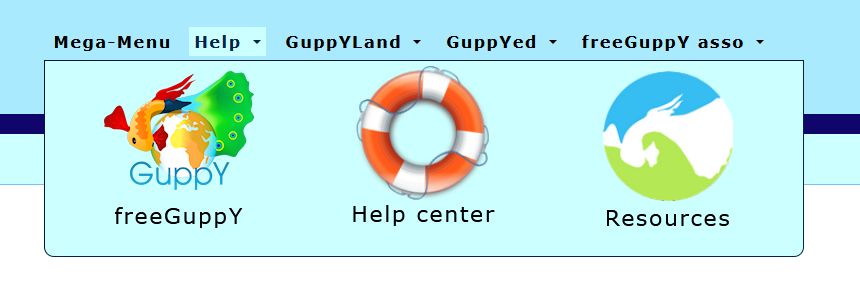
For GuppYLand, GuppYed and asso freeGuppY, it is simply an image, a link and text.
The customization of the drop-down menus is not very simple, in the styleplus.css file the lines 11 and 12 of the skin6_guppy_03, you should not change the max-width values.
1. Creating a Dropdown Menu Option:
Way to proceed:
Noter : each option is to be configured and saved one after the other.
Tip to get started: take a piece of paper (yes you do!) to set up a diagram of your dropdown menu and jot down all the configuration steps as you go. Configure the dropd own menu options one after the other according to the desired display order.
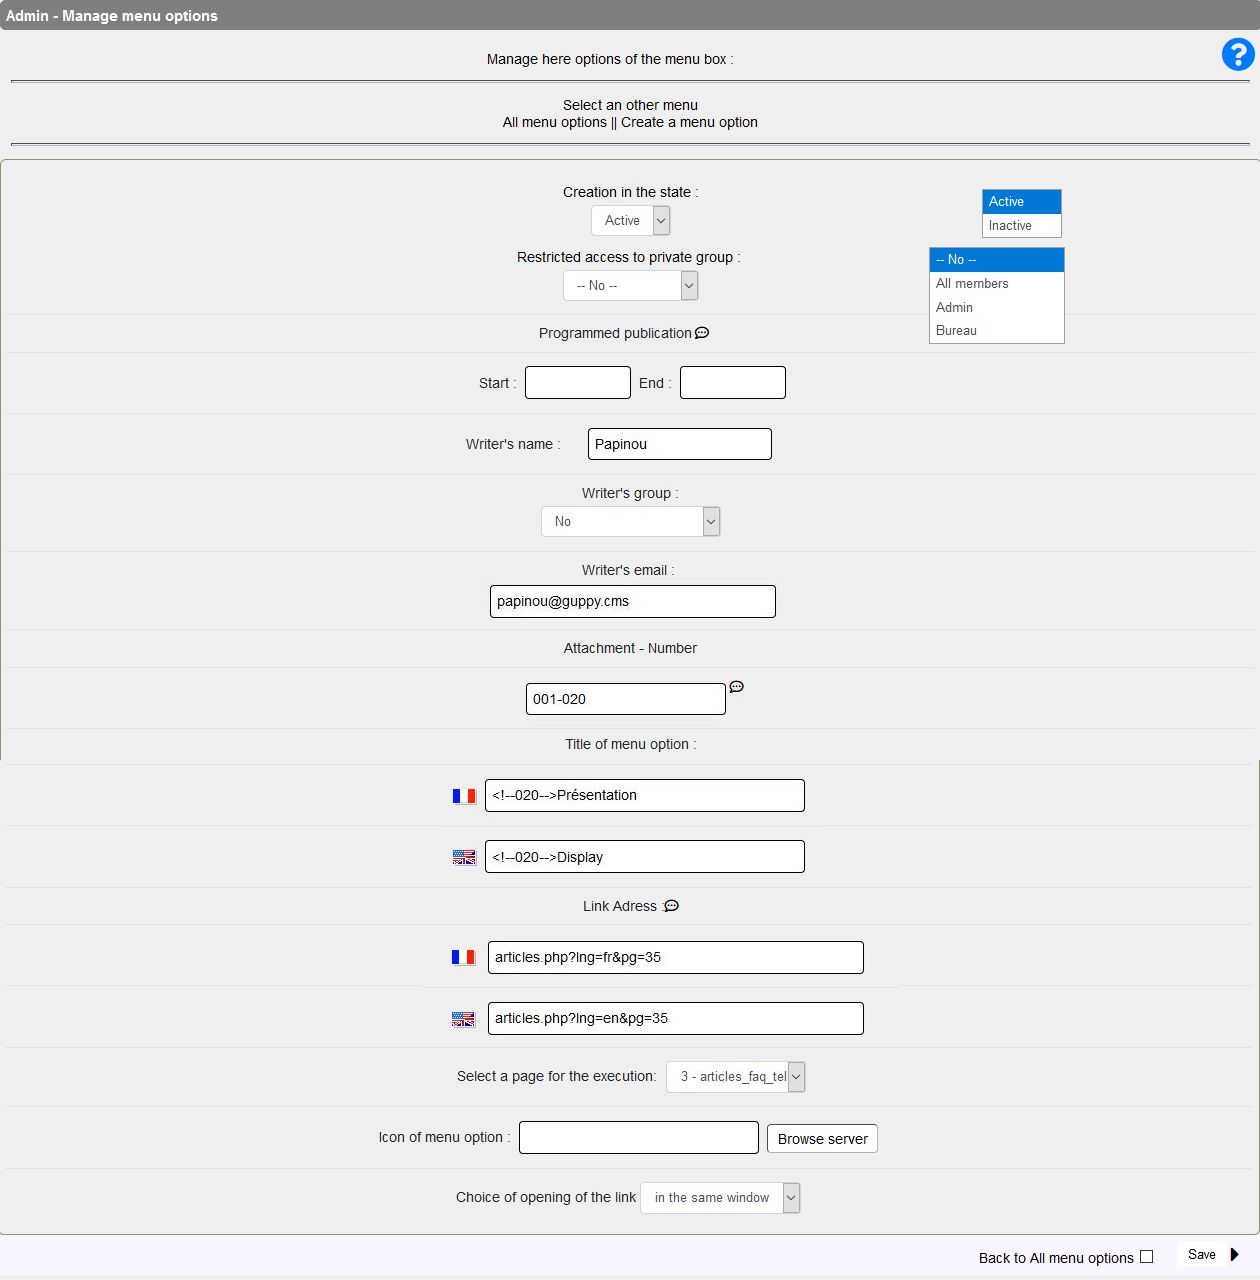
- Click "Create a menu option".
- A new page show that provides several input boxes to :
- Set dropdown menu option state:
- Active, it will be available for display in the dropdown menu "Introduction"
- Inactive: this cannot be displayed on the site page as is. For example, when you are working on items that will be listed in a new menu box that you do not wish to make visible right away.
- Restrict or give access to a private group that you will have determined in "General Management>Data management"
- Program the publication of the option. Date of start OR date of end in format YYYYMMDDhhmnmn (Year, Month, Day, hour and minutes)
- Then enter the writer's name and their email address in the provided field.
- Input fields Attachment-Number and Title of menu option.
- This the first option, so:
- Attachment-Number: type 001
- Title of option : <!--001-->Introduction
- Input field "Link address"
- For a category, there is no link you put a question mark ?.
- For an article, you put the link to the article
- Zone Select a page configuration: select 3 - articles_faq_telech by default.
- Box Icon of the menu option. You can choose an icon that will show next to the option title; for that purpose, please click the icon : "Browse server". In our example, there's no icon.
And eventually, don't forget to click the "save button"... so as to ..."save" your changes!


