Look Config
Look Config
In the Settings area, clicking this icon  will take you to the configuration page of the look setup.
- General settings:
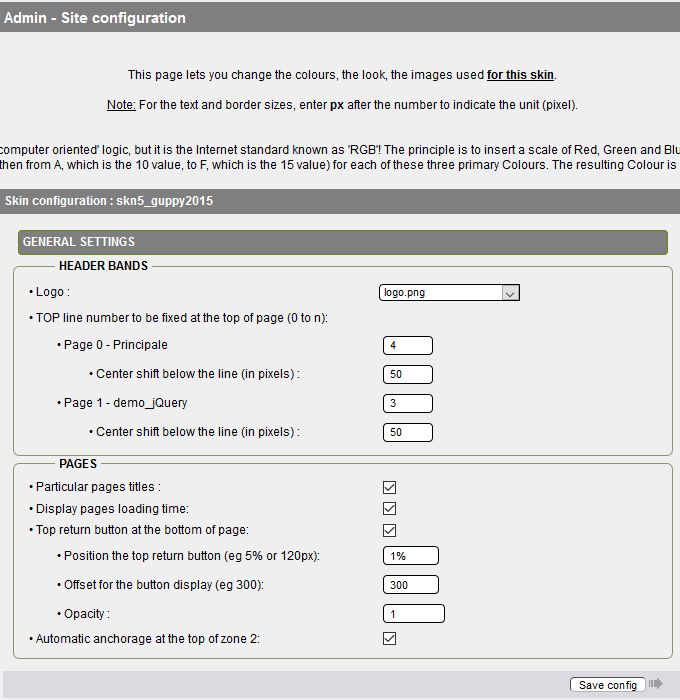
The choices are limited to the Logo, the TOP Line Number to be set at the top of the page, the individualized page titles that you should tick, then the display or not of the javascript banner, the page loading time and the display of the popup Page being loaded, the Return button at the top floating and the automatic anchoring at the top of zone 2.
When you have finished the configuration, you must save by clicking on Save configuration.
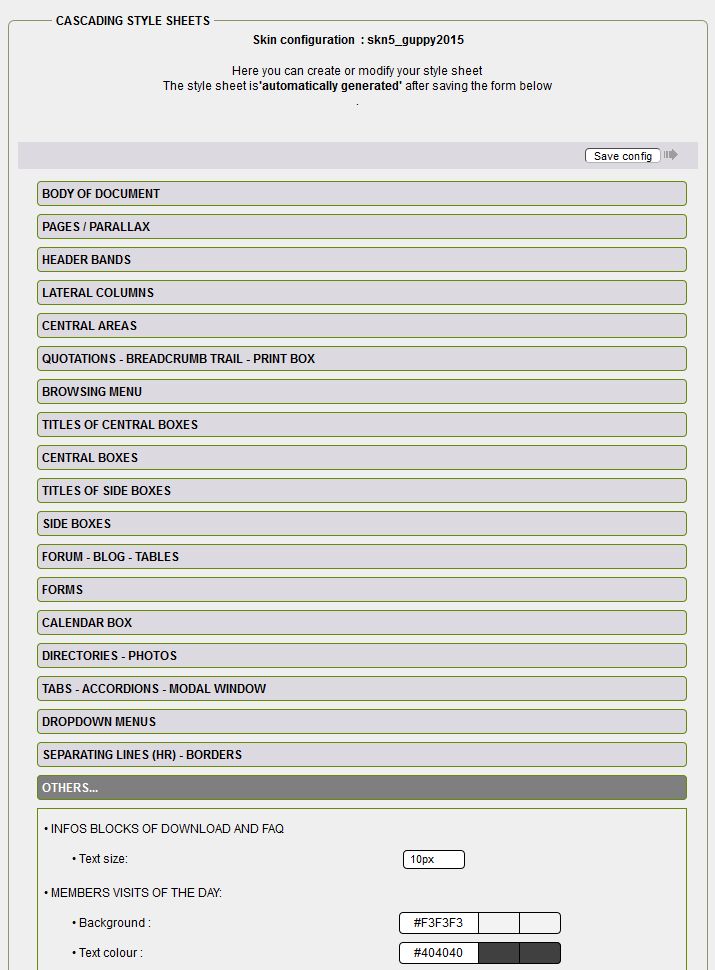
- The configuration look topics :
Using Config-look - GuppY 5.02.XX
The evolution of the version of Config Look included in the GuppY 5.02.XX package allows you to go even further and more easily in customizing your skin, the goal being to manage the maximum in Config look to simplify the styleplus. css file.
All skins in the pack have been adapted for Config Look but we recommend that you start with a copy of the no_skin or the skn5_maskin02, read the GuppY 5 skins update tuto available on this link.
Important! Before modifying the skin of your site, you must have done the configuration of the boxes in Config box.
More details in the Config look tutorial on this link.
The working principle is the same for all fields, you select fonts, size, your images, colors, styles etc.
All Config look fields must be filled in correctly with values corresponding to each field.
Some exceptions:
- JavaScript banner disabled, it is preferable not to check so that the visitor is warned of the deactivation of his javascript,
- Fixed, you check it only if you have a still image (1920 x 1080px) in the background of the site,
- Opacity can take several values:
- Transparency value: default value 1 will be used if the Background field is filled with: Transparency
- Transparency value: 0.1..... 0.5,0.6,0.7,0.0.8,0.0.9 for the transparency of the color indicated in the previous field, the color will be coded with rgba (rr, gg, bb, opa)
- no transparency: you put 1 and the color will be displayed at 100%, the color will be encoded with rgba (rr, gg, bb, opa)
To change the color, click on the left area (of a color item) to bring up the jquery Color Picker script.
Sometimes a little delay per click is necessary to move around in the color input window.
The two adjacent areas allow you to visualize the old and new color, once the new color has been selected, do not forget to validate the color by clicking on the circle at the bottom right of the Color Picker window.
When you have configured all the topics, don't forget to save the configuration to generate the style automatically, your skin is finished and operational.
Once the style generated, you display a page to see the result, it is necessary to refresh the page to display it without going through the cache.
Watch out! Watch out! you will not be able to make manual modifications in the files style. css, jqstyle. css, you must use config look.
To further personalize your skin, click Config Style and then Edit the CUSTOMIZE Style Sheet (styleplus).
In this styleplus. css file, you will add all the customizations you want to bring to your style sheets, style. css, jquery. css can be customized in the styleplus file, without overloading it it should contain only the strictly necessary.
Attention! You need some knowledge of css style sheets to allow yourself a significant customization.
To help you you can use the skn5_maskin02 which shows some possibilities with a minimum of customization, it is downloadable on this link.
Tip: While browsing the tutorial, you can open Config look for the skn5_maskin02 and see all the options proposed by topic.
When the configuration is finished, click on "Save configuration" to save it and generate the style sheet.


