

Secondary page settings
Secondary page settings
1. Purpose of secondary pages :
Secondary pages let you offer extra contents while not making display heavier in the side columns of your site. You may as well insert plugins, e.g. plugin jQuery.
Secondary configurations will be set up in Boxes Config.
They'll be added to the list of available pages. It then suffices to select a secondary page, and specify for this chosen page the desired locations of boxes according to the same process as main configuration.
2. Display example on a particular site
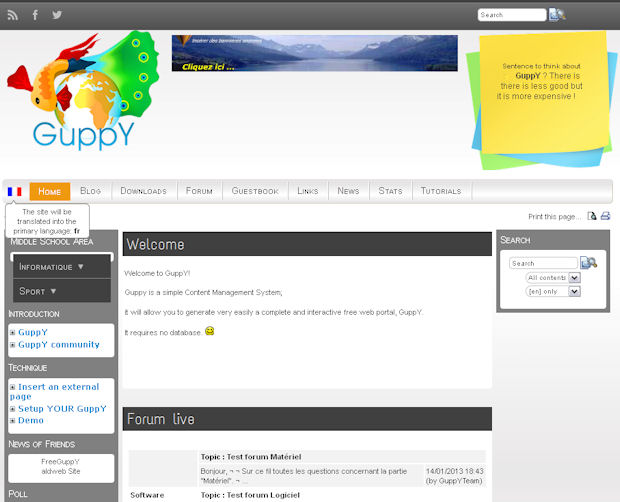
For main page configuration, this is the page the visitor will get to.
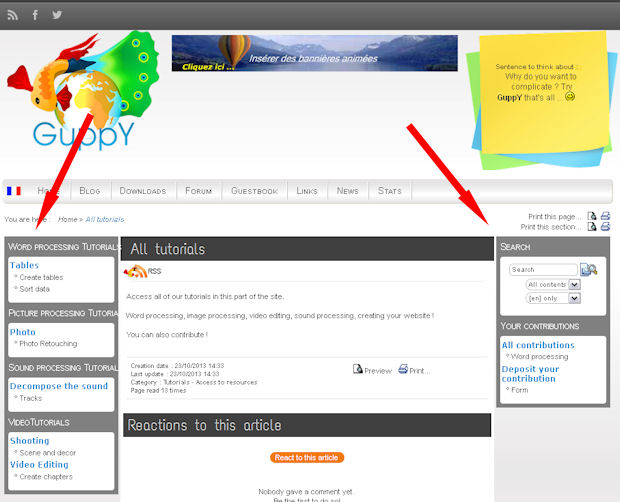
In this example, when visitors click the menu icon menu "Tutorials", they get to the secondary page below where the boxes layout has been specifically set pour that secondary page.
- You wil notice new boxes instead of the main page boxes.
- You will also notice the icon "Tutorials" is gone.
The menu options of these boxes are also set to show according to this secondary page look. Display will be the same with the same boxes showing each time the visitor will click on a link in these boxes.
This display has been chosen and set in the Boxes Config section.
Thus, at no display overload expense, visitors will get access to new contents.
Clicking one of the menu icons will take the visitor back to a main page display style with the corresponding boxes to main page, since it has been so configured..
Possibilities are many and thanks to the configuration of secondary pages, your site will be enriched, but not made heavier.
2. Configuration :
Building on this practical example, we invite you to configure a layout for a secondary page and allow access to the secondary page content by clicking the icon Tutorials on the menu bar.
As far as the next tutorials are concerned, Menu boxes are expected to be created so as to show in the secondary page and articles are ready to be stored in those boxes (If needed, please refer to the relevant online help).
You need Menu boxes that will give access to articles. Boxes and articles to be shown only on the secondary page named Informatique.
You need a categoryless article that will appear in central page and that will show the part related to the secondary page. Here, we deal with the computing section about Tutorials.
You need a menu box that will not show and will hold the categoryless article you have created above.
Then you must: create the secondary page, create menu options, create and configure the menu icon in the menu bar.
The secondary page configuration is available in Admin>Configurations>Boxes Config
Menu options boxes are configured so as to have the same look as the secondary page. This configuration is available in section Admin>Structure>Menu options.
The Menu icon will be configured in the section Admin>Structure>Icon Menu.
a. Creating the secondary page.
This is dealt with in the section Admin>Configurations>Boxes Config :
In the top part of the page "Add a page configuration" : in the relevant field, enter a name for a secondary page. Here : Informatique.
ATTENTION ! In the case of a bilingual site, the secondary page that shows in the second language side of the site is named the same as the page in first language.
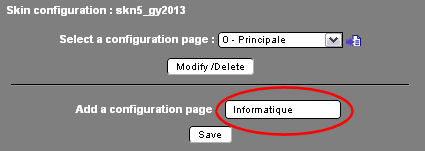
Then click on Save.
b. Configure the display of boxes for this subpage.
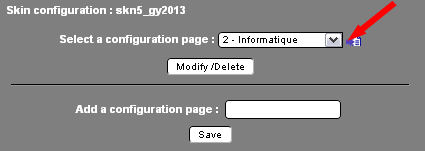
Select the subpage that has just been created.
Then, in each column part, right, left, top, bottom, center, select the boxes that will be displayed for this subpage.
Here, we choose to keep the boxes at the top of the main page and the menu bar,
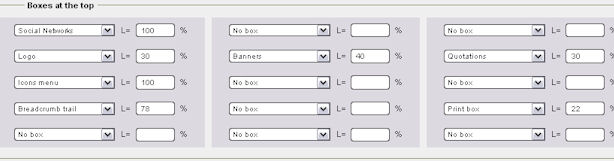
and to display the menu boxes created for articles about computer tutorials, a menu box presenting the contributions of Internet users and a search box.

Finally click on the Save button.
c. Configure menu options for side boxes.
The articles in these boxes must be displayed in the same way as the display chosen for the Computer subpage. This must be configured for each menu item in each box.
We will make a single example, for the following, the process is to be reproduced for each of the items contained in these boxes.
Let's take care of the first box called "Word processing tutorials".
Go to Admin>>Structure>> Menu options 
Select the menu for which you want to configure the options for each item.
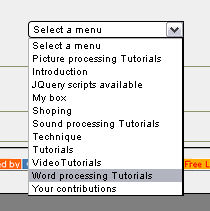
On the page that appears, click on "Create a menu option". (Refer to the Online Help section "Menu Options" if necessary.)
Fill in the various fields required: Category of the menu option, Title of the menu option (of the item), Select the box in which the item will be accessed, the display mode of the side boxes - Select Standard. Select a page configuration, choose of course Informatique to find the display of the boxes configured in the previous paragraph.
Leave Choice of opening the link on in the same window.
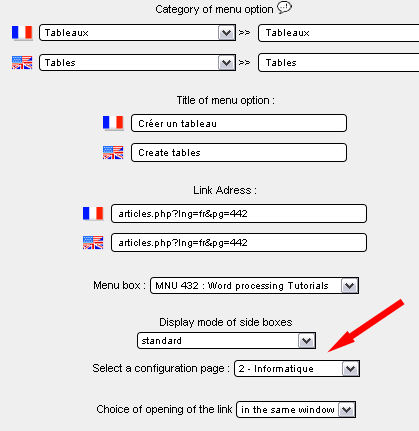
Click on save.
Then configure each menu option (article in this case) and make sure to select the I page configuration each time.
d. Create the article without category that presents the Tutorials part
The Tutorials icon in the top menu bar gives access to an article that appears on the center page and presents the "Tutorials" section of the site. (See the 2nd image at the top of this help) In this example it will be the only access for visitors to the secondary Informatique page and all its content. This item will be attached to the menu box not displayed and configured so that it is displayed as a Informatique subpage configuration.
Technical:
This article must be written beforehand, put in a menu box that you will not display. Once the article has been written and saved, go to Admin>>Structure>>>Menu boxes to create the menu box that will not be displayed, give it a name, for example "Tutorials" and save.
Then configure the option of this menu box in the Admin>>Structure>>>Menu Options section.
Select the "Tutorials" menu box created above, then on the page that appears, click on "Create a menu option"
The article must be without category, just with the title. See the image below.
Leave the Category field empty, give a title to the article. This is all the tutorials. Enter the URL of the article in question (to see the ID number of the article go to the Admin>>Data administration>>Articles section
This article with the ID number 452 in our example it is in the Tutorials menu box (box that will not be displayed, let's remember it)
Select a page configuration: Informatique, is our secondary page.
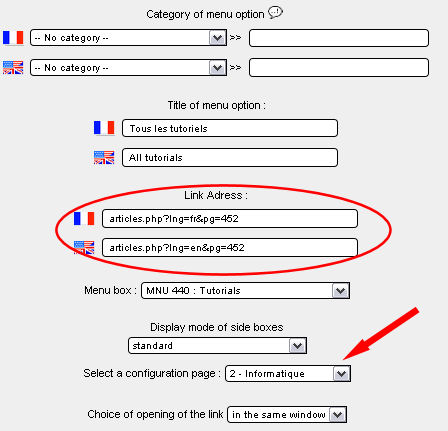
Click on Save. Then notice the URL Address of the link fields. Guppy has added the ID number of the menu box in which the access to the article is located, here 440 and the configuration of the subpage, here n°2
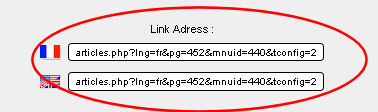
Select and copy this complete URL, you will need it to configure the menu icon in the next step.
e. Create and configure the menu icon in the top menu bar.
In our example, this icon is called "Tutorials" and we remind you that we do not want it to be displayed in the "Computers" subpage configuration.
Go to the Admin section>>Structure>>Icon menu 
Click on Create a menu option.
On the page that appears, fill in all the fields (if necessary, refer to the online help menu Icons) as in the example below.
The ID number for this icon menu option is 00, because it is our first icon created, but you can give it another ID number.
Icon label: Give a name to the icon: Tutorials
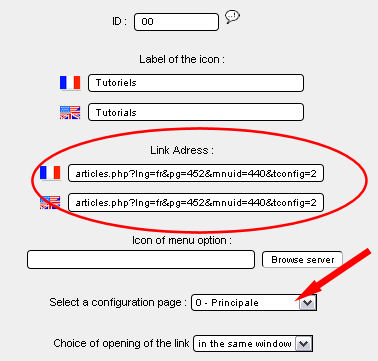
Link address: this is the URL of the article that presents the tutorial part of the site, an article written previously and attached to the MENU440 box with the page 2 configuration option.
Then paste the URL address of the article copied in the previous step.
Select a page configuration.
Attention! This time, you should not choose Informatique subpage, but Main page, since you do not want the Tutorials icon to be displayed in the Informatique subpage, but only in the Main page.
Click on save.
Go to the home page of the site: the Tutorial icon is displayed, the side boxes configured for the main page display. Click on the Tutorials icon in the menu bar: you now access the configured Informatique subpage display. The article is on the central page, the new boxes are displayed and the Tutorial icon is no longer displayed. You click on one of the links in the side menu boxes and you arrive at your content with the same subpage display as the Informatique subpage.
3. Other tracks:
The possibilities are many! You can also access the subpage display from a menu box, from a drop-down menu. You can insert a plugin in a subpage, such as the JQuery plugin that allows you to present slideshows dynamically.
Have a good time!


