Services config
Services config
In the administration area, click the Configurations tab, then click this icon:
 you get to the configuration page of your site services.
It is on this page that you select the services you want to enable on your site. It is also on this page you set supervision returns mails.
The services are divided into 15 areas:
- Administration
- Blog
- Articles
- News - Photos - Poll
- Download - FAQ
- Links - Guestbook - Forum
- Calendar - Recommend - Newsletter - Advanced Contact
- Member's area box
- Other - News
- Number of items per service
- Service RSS
- Service Sitemap
- Visitors contributions and anti-spam
- Captcha
- Supervision
Do not forget to click the "Save config" button to ... SAVE!
1. ADMINISTRATION AREA
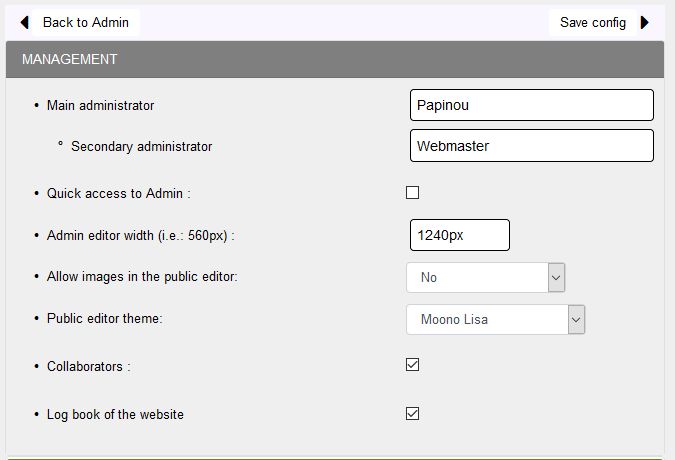
- In the " Administrator" box, you must add the name or username of the member who will be the main site administrator.
- In the "Secondary administrator" field you must add the name or nickname of the member who will be the secondary administrator of the site.
Reminder: the secondary administrator must be a member of the site and you must have declared him a collaborator with admin collaborator rights.
- By checking the "Access to the rapid administration " box, administrators will have access to a shortcut to edit specific content without having to go through the administration page.
- Then set then the frame width of the text editor, by default, it is 800px .
- You must select an option for images in the public editor: No, Yes, All members or Administrators, Collaborators.
Warning: images may contain viruses... we advise you to keep control, All members seems the maximum to allow.
- " Collaborators": this box is checked by default, it is essential for the addition of the secondary administrator.
- Check the logbook if you want it to show in admin: you can thus type there for our collaborators, any changes or additions made to the site.
- Click the button " Save the config ."
2. BLOG AREA
You must check Blog Section box, if you want to enable the display of the blog on your site. Then for all options, you must select items in the list or check boxes.

- For "Access to the private group" If you select a private group, by default the group "All members" is created with all the members of the site.
- For "WEB menu type", you select an option of your choice: List menu, Dynamic menu, Dynamic list menu n°1, Dynamic list menu n°2
- For "Select a page for execution", always selectable: All pages, 0 - Main page, 1 - Subpage ...
- For "User Posting" and "Blog Comments", you can choose from three options: No, Add without confirmation and Administrator Confirmation
- For "Height in pixels of blog posts", by default 0 = the post displayed in full, you can choose a height: 50px, 100px, 200px...
For all the following options, it is simply a choice between checking or unchecking
|
Note: "Include the social network code" For example insert at the bottom of news (or article, or post) the button "Like" the well-known social network, you check box in the "News" section. Then you go to the part of administration Social Networks "Social Networks" >> "Social Network Code for services" and you paste the code in question that you have previously copied on the social networking site or serious webmastering sites that give this type of code. |
You can change your choice later by returning to Services - Blog
3. ARTICLES AREA
This is the part where you choose the configuration options of your articles.
First, you select one of three options for responses to articles : No, Add without confirmation and Administrator Confirmation
Then for all options, you must check the box to be enabled.
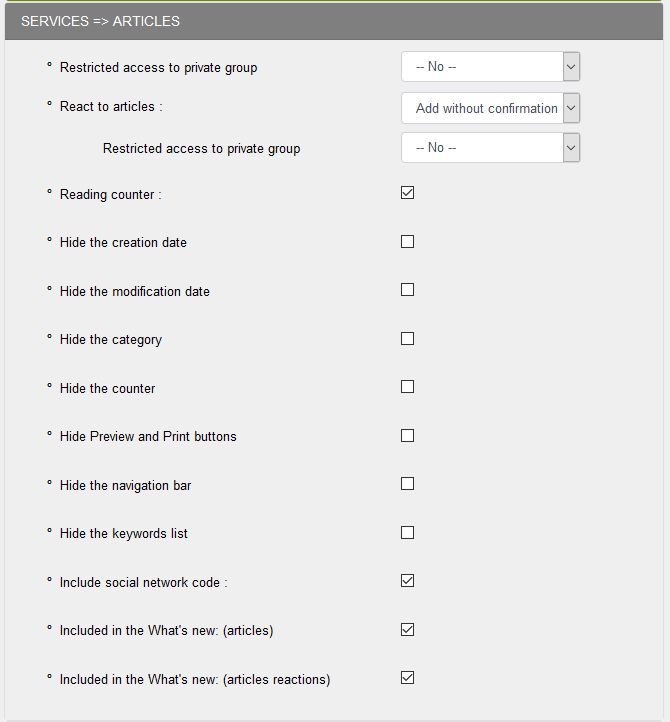
Note: As for the blog, you must have configured your code for social networks or creating your social networks access.
4. NEWS - PHOTOS AREA
It is in this section that you choose the configuration options for news and photos.
First you must check the News section and Section Photos, if you want to use them on your website.
For the news:
- For "Access to the private group" If you select a private group, by default the group "All members" is created with all the members of the site.
- For "Displaying user news" as desired, three options are available: No, Add without confirmation and Confirm administrator
- For "Height in pixels of the news", by default 0 = the news displayed in its entirety, you can choose a height: 50px, 100px, 200px...
- For "Select a page for execution", always selectable: All pages, 0 - Main page, 1 - Subpage
Then you select the options you want to use on your site.
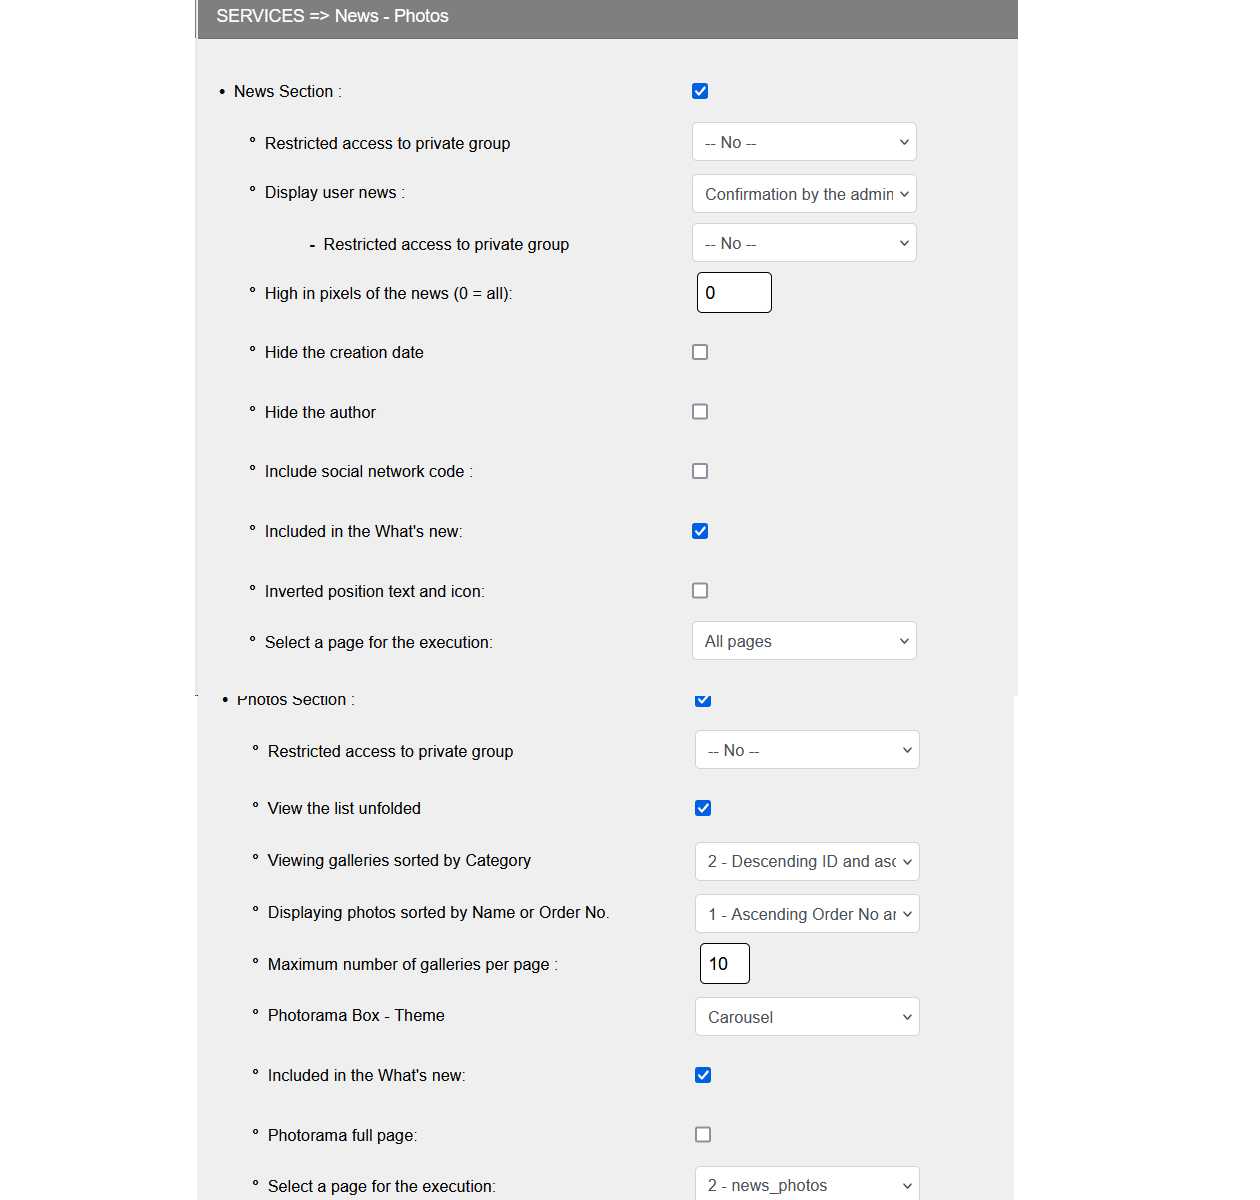
For the photos:
- For "Access to the private group" If you select a private group, by default the group "All members" is created with all the members of the site.
- Choice of photo display order, either by photo name or by entered order number (See Manage photos).
- For "Number of galleries per page" 10 in the example, you do not put too many, 5 for example if you have many galleries
- For "Photorama Box - Theme", you can choose between Tiles, Carousel and Slider
- For "Select a page for execution", always selectable: All pages, 0 - Main page, 1 - Subpage
- For the other options, simply tick or uncheck
Note: As for the blog, you must have configured your code for social networks or created your social networks access.
5. DOWNLOADS - FAQ AREA
First you must check the Downloads section and FAQ section, if you want to use on your website.
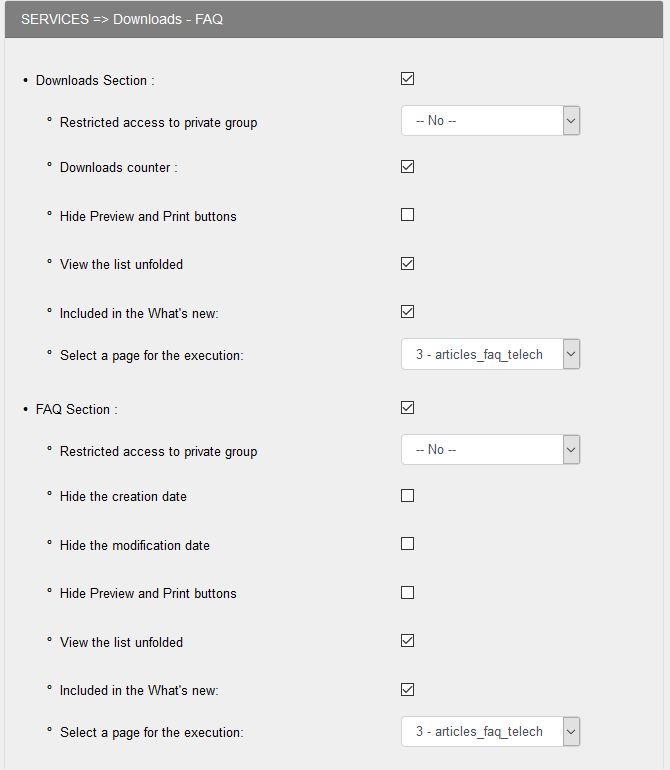
Then for all options, you must check the box to enable.
6. LINKS - GUESTBOOK - FORUM AREA
This is the part where you choose the configuration options of Links, Guestbook and Forum.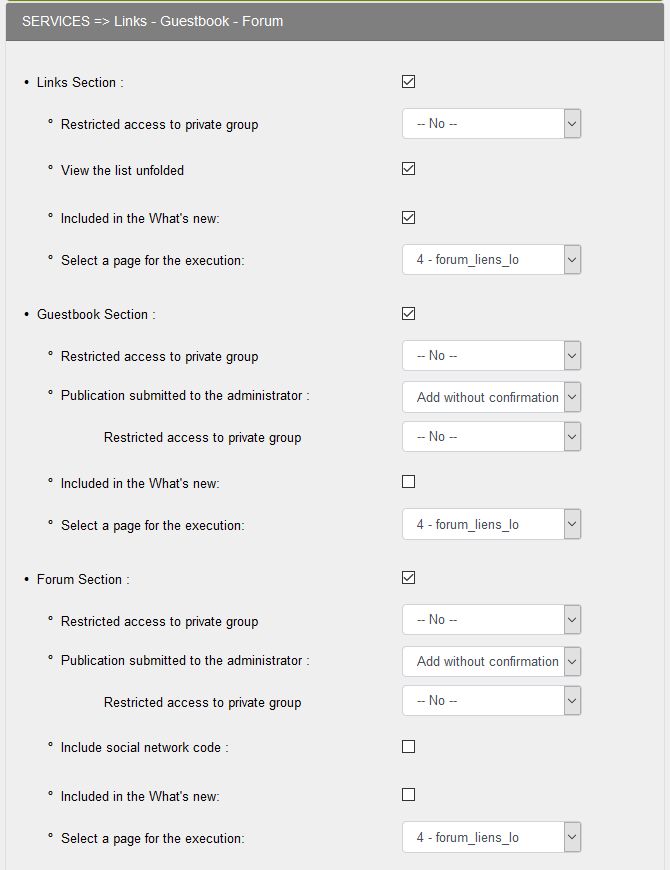
- For "Access to the private group" If you select a private group, by default the group "All members" is created with all the members of the site.
- For "Selecting a page for execution", always choose: All pages, 0 - Main page . 4 - forum_liens_lo...
Note: As for the blog, you must have configured your code for social networks or created your social networks to enable access to the forum.
7. CALENDAR - RECOMMENDED - NEWSLETTER - ADVANCED CONTACT AREA
This is the part where you choose the configuration options of Statistics, of Agenda, of Recommendation, of Newsletter and advanced Contact .First you must check the sections you want to use on your site.
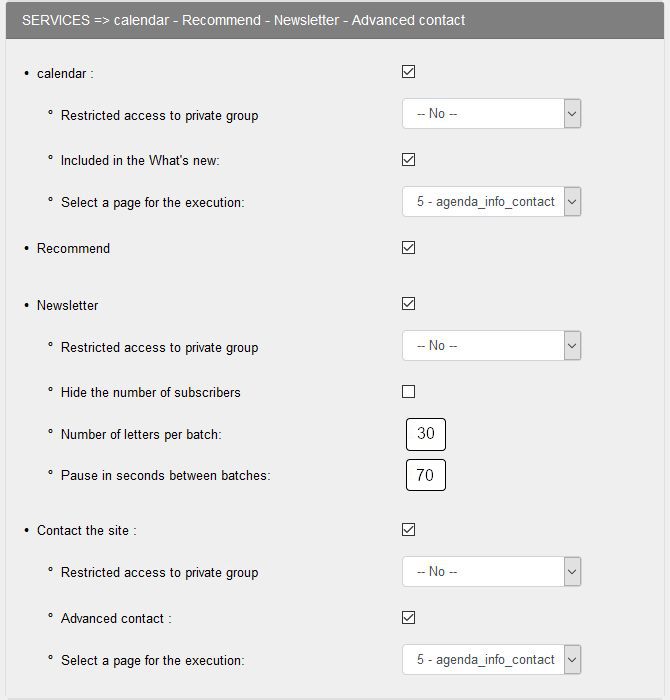
- The line "Recommend": If the box is checked, visitors have the opportunity to ... recommend your site to others who might be interested in its content. The link "Recommend" is in the "Webmaster-info" side box.
-
The "Newsletter" line: if you tick the box, you can send a newsletter to your subscribers.
To avoid attracting the envy of spammers, you can check the Hide number of subscribers box. -
For "Access to the private group" If you select a private group, by default the group "All members" is created with all the members of the site.
-
For "Selecting a page for execution", always choose: All pages, 0 - Main page . 5 - agenda_info_contact
-
For the sending of your newsletter, we followed the recommendations of our partner o2switch, namely the sending of 30 letters per batch, followed by a 70 second pause, then a new sending of 30 letters... until the end of your sending to your subscribers.
You can increase the pause time, for example 90 seconds. This is to avoid spam classification or blacklisting of your emails.
Warning: This configuration is valid for o2switch, you must check with your host, some limit the number of emails per hour to 100. If you leave the fields empty or if you put 0, the sending is done without pause. - The line "Contact the site" can contact the site by an advanced contact form. This is enabled by default. The link "Contact" is visible in the box" Webmaster-Info. "Form is set by default with telephone number and fictitious address as an example. To personalise, go to" GeConfigurations >> Contact ".
8. MEMBER'S AREA BOX
It is here in this part you choose the Member's area box configuration options.
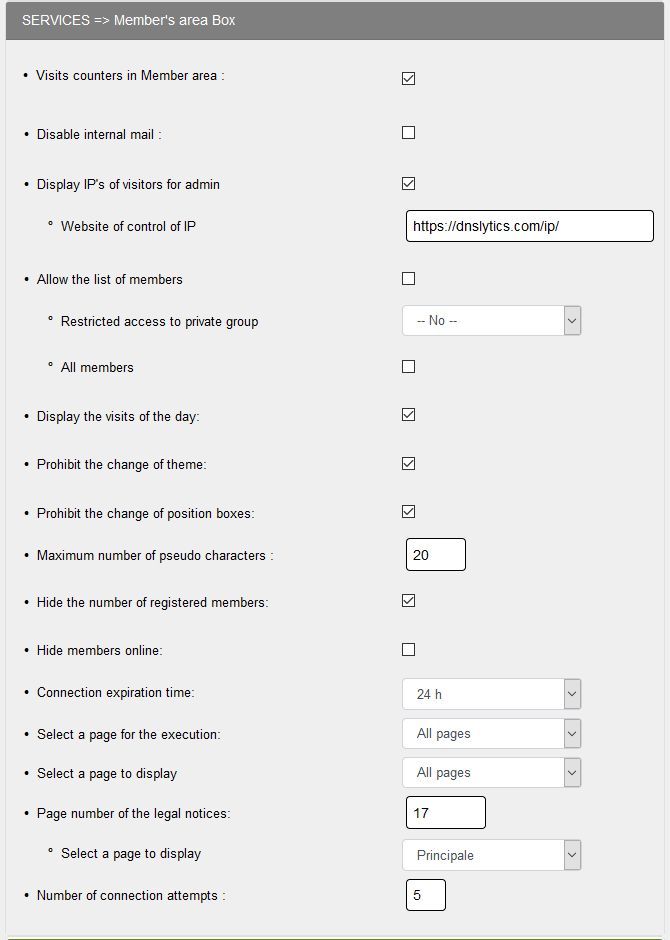
It is the same principle as the other headings either to tick or to select.
- For "Disable internal mail", if you check this box private messages for all members, only the main site administrator will be able to send private messages to members.
- For "Authorize the list of members", it seems judicious not to tick this box or at least to limit to all members to avoid the curious ones
- For "Max. number of characters of the nickname", 20 seems to be more than enough
- For "Connection Expiry Time", 30 minutes but you can increase by selecting a proposal
- For "Page number of legal notices, 17 in the example, it is the ID of the article of legal notices
- For "Number of connection attempts", 5 by default, it is the number of attempts before the member account is blocked, it is better not to increase for security reasons
9. OTHERS - LATEST NEWS AREA
This is the part where you choose the configuration options of the home page, RSS, documents, automatic banners and quotes rotation, news site and display images news.
First you must select the display of your site's home page. You can choose between the home page, the blog page, the news page, the forum page or the page of the calendar. You choose depending on the content of your site!
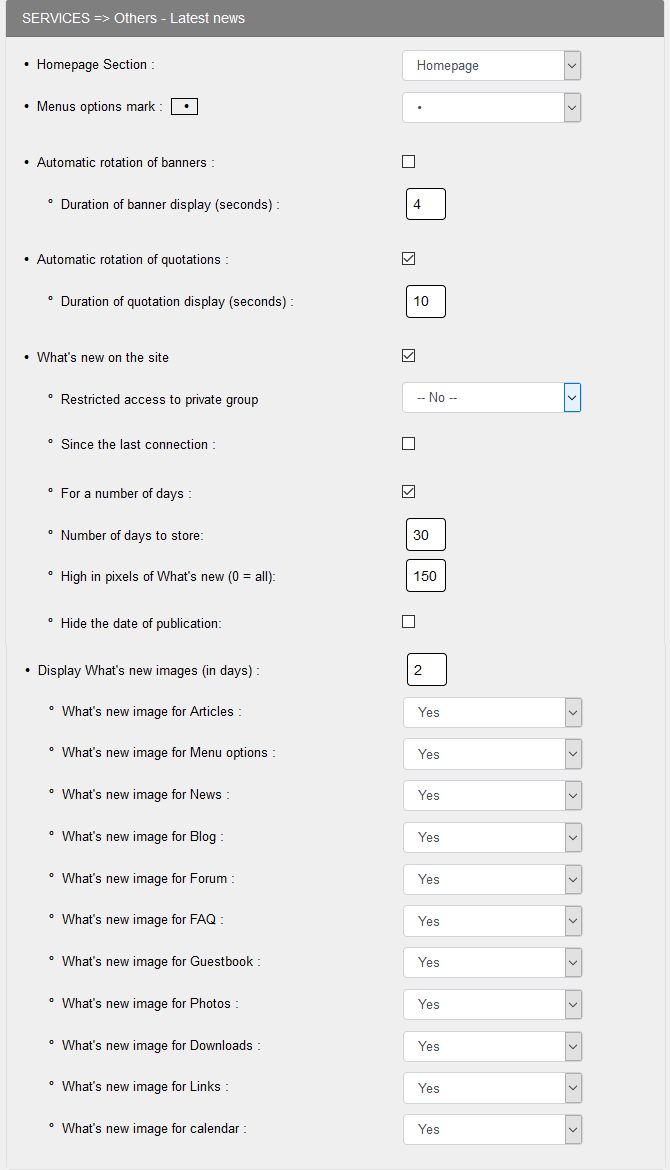
Then you select the options you want to use on your site.
- The line "Auto Rotate banners" as the name suggests allows display banners one after the other in a loop on a display time in seconds set in the corresponding box.
Note: for the service to work, you must have previously enabled Banners box in Admin>Configuration>Config boxes.
- The "Rotate quotes": on the same principle as that of the banner rotation, but it concerns ... quotes!
Note: for the service to work, you must previously have enabled "Quotes" box in Admin>Configuration>Config boxes. -
For new features on the site, you can choose between "Since the last connection" or "Since a number of days", you do not have to select both options, it is either one or the other. The option "For a number of days" seems preferable to me so as not to slow down the display.
-
For "news" images: you define the number of days and then check the services where you want to display them!
10. NUMBER OF ITEMS BY SERVICE AREA
This part of config service allows you to determine the number of items that display on each page in the various services: news, blog posts comments, reactions to articles, messages in the guestbook, forum threads ...
The boxes have been filled with default values. You can leave them as is or will enter the values of your choice.
Tip: think about the functionality of your site. Example: if you have a lot of comments in your blog, it is more convenient for visitors to access their reading if the list includes 15 comments following that 5 on several pages! Value will then be set at 25.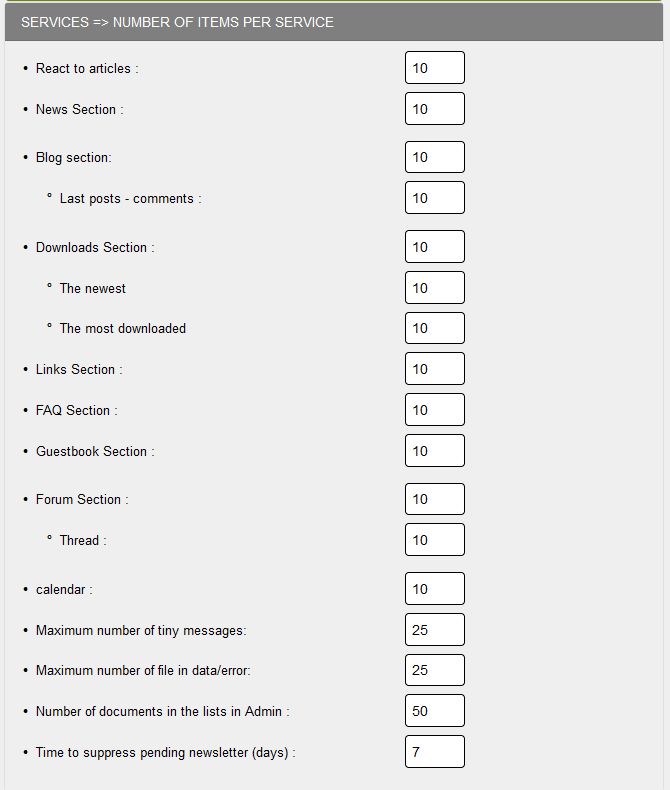
|
Note: Maximum number of files in data / error. This number is 25 by default. This directory stores files that are created when an error occurs on the site. For example, the "404" error when the server can not find the requested URL. |
11. SERVICE RSS AREA
"Really Simple Syndication", also referred to as RSS feeds. This is a file that a web or blog site provides its visitors with.
In this file are grouped the title and content of the latest articles or blog entry or news, and a link to go to the website in question.
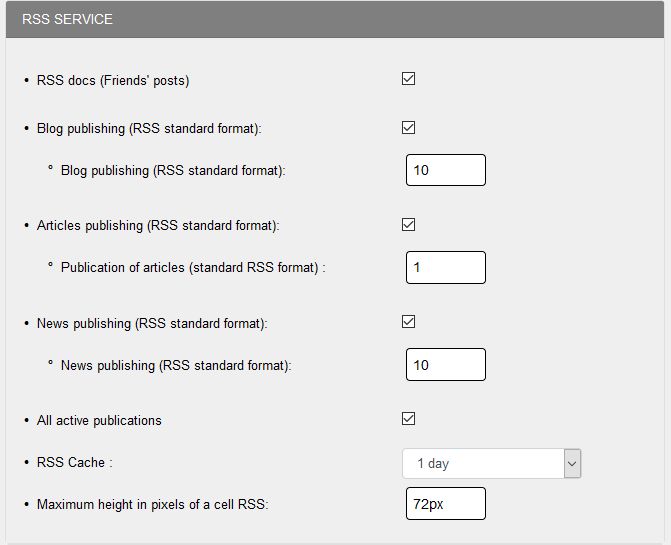
The other two settings in this area:
RSS in the social networks box : Guppy comes with a social networking box where the corresponding buttons to well-known social networks show. If you tick the box, the RSS button will be visible in the same box, allowing on a click visitors into the RSS service you have chosen to offer them.
Cache RSS: set to 1 day by default, this is the refresh rate of the feed:
For example, if you publish a new article, it will be visible in the RSS feed in the next 24 hours at most after its publication.
If you set the cache value to 15 minutes, the item will be visible at the most 15 minutes after its publication.
To learn how to set up the RSS service, refer to the particular help to this service.
12. SITEMAP SERVICE AREA
What is a sitemap :
A Sitemap allows webmasters to tell search engines which pages of their sites to explore.
In its simplest form, a Sitemap is an XML file that lists URLs for a site along with additional metadata about each URL (date of last modification, revision frequency and importance relative to other URLs in the site) in order to optimise search engines crawling through rthe site..
The web crawlers usually discover pages from links on the site and from other sites.
A Sitemap provides this data to allow crawlers that support Sitemaps to extract all URLs in the Sitemap and gather information about those URLs using the associated metadata.
Using the Sitemap protocol does not guarantee the inclusion of web pages in search engines, but can provide guidance to crawlers and optimise their operation.
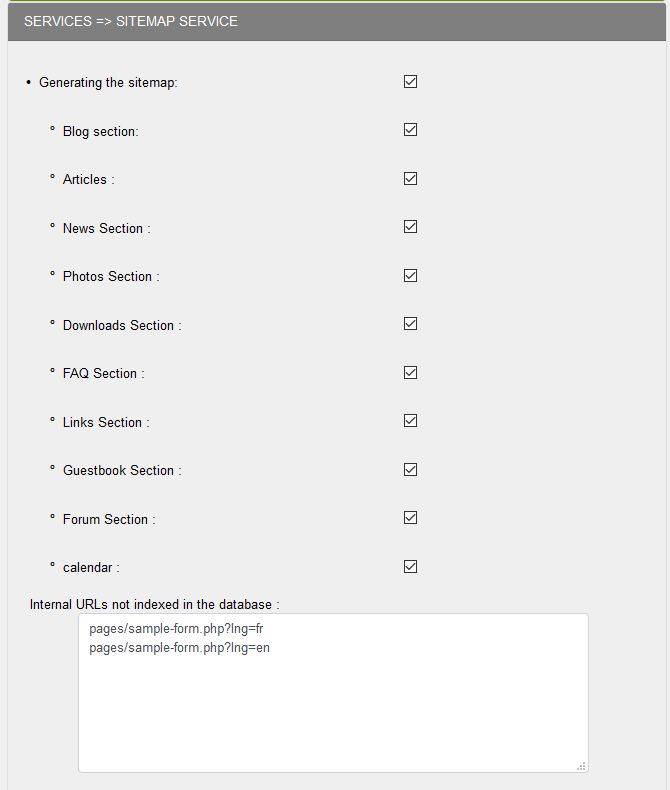
You must check the services that you use on your site so that URLs are taken into account in the generation of sitemaps for your website.
After generating sitemaps, you must indicate their presence in each of the search engines.
The major search engines provide after registration files to the root of your site for easy indexing.
13. VISITORS' POSTS & ANTI-SPAM
Depending on your choice, visitors can leave comments, post news, a topic of discussion in the forum ...
visitors'contributions
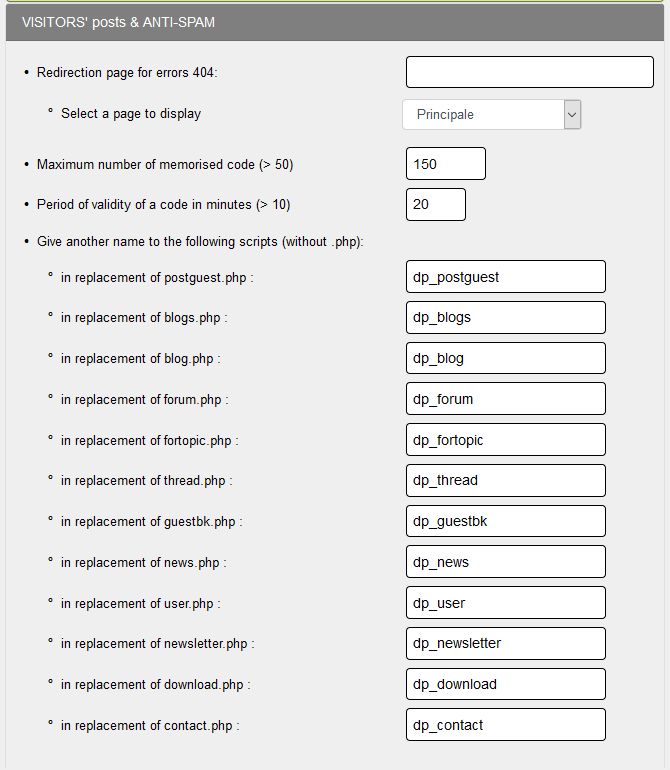
Anti-spam system:
Spam refers to a pollutant email or unwanted email, sent in bulk for advertising, hoaxes, swindling via an email address left on a forum, a comment, a form...
Guppy includes a whole anti-spam system to prevent as much as possible these sendings:
The maximum number of codes stored indicates the amount of malicious data antispam file must store (minimum 50 in the example : 150) codes;
The validity of a code in minutes represents the time during which a code is kept in the same file before being replaced by another (minimum 10 minutes, in the example: 20 minutes).
Accordingly, if a user sends a script in a forum post, this command will be stored for a minimum of 20 minutes (see illustration above) . Therefore, if a script is sending a burst release, all posts containing that very injected script will be denied entry .
Renaming sensitive files is an important protection for all files using forms .
Since mid-March 2013, a wave of spam has invaded the web, spambots posting thousands of spam to unprotected sites every 24 hours.
It is strongly recommended to apply the renaming on your site and it is in this area that you can do so by replacing the original name with a name of your choice.
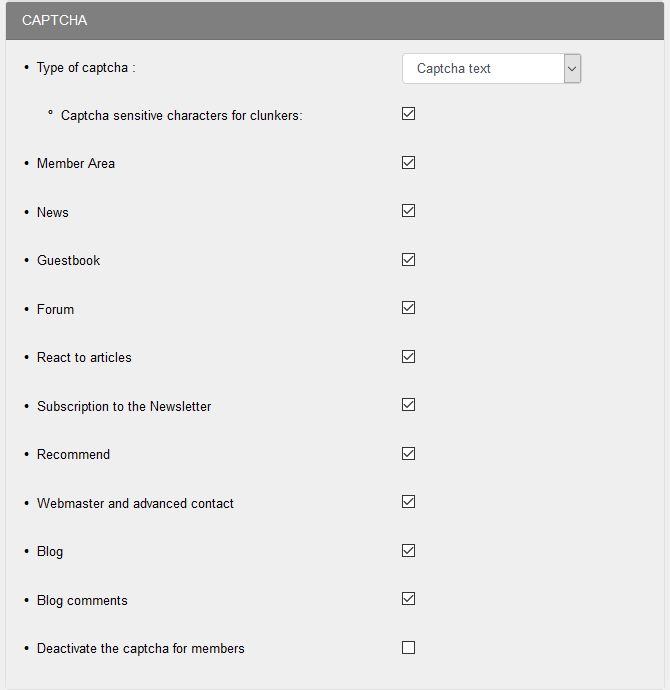
14. CAPTCHA AREA
The captcha is a test used in computing and networks to differentiate automatically a human user from a computer one.
This type of test is often found on websites or blogs forms to protect against malicious robots made by and intensive automated submissions.
This captcha is based mostly on reading a series of distorted letters or digits that only a human can analyse and write.
Guppy allows you to use the captcha in forms available to visitors. Simply tick the boxes .
Caution: for the wave of spam in 2013, it seems inconceivable not to use a captcha to protect its website from this scourge of spam.
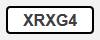
You can choose between two different captchas : captcha sensitive or non-sensitive to simple text and a second more sophisticated captcha text where you must enter a code corresponding to a display of letters and numbers.
Sample text captcha without breakage:
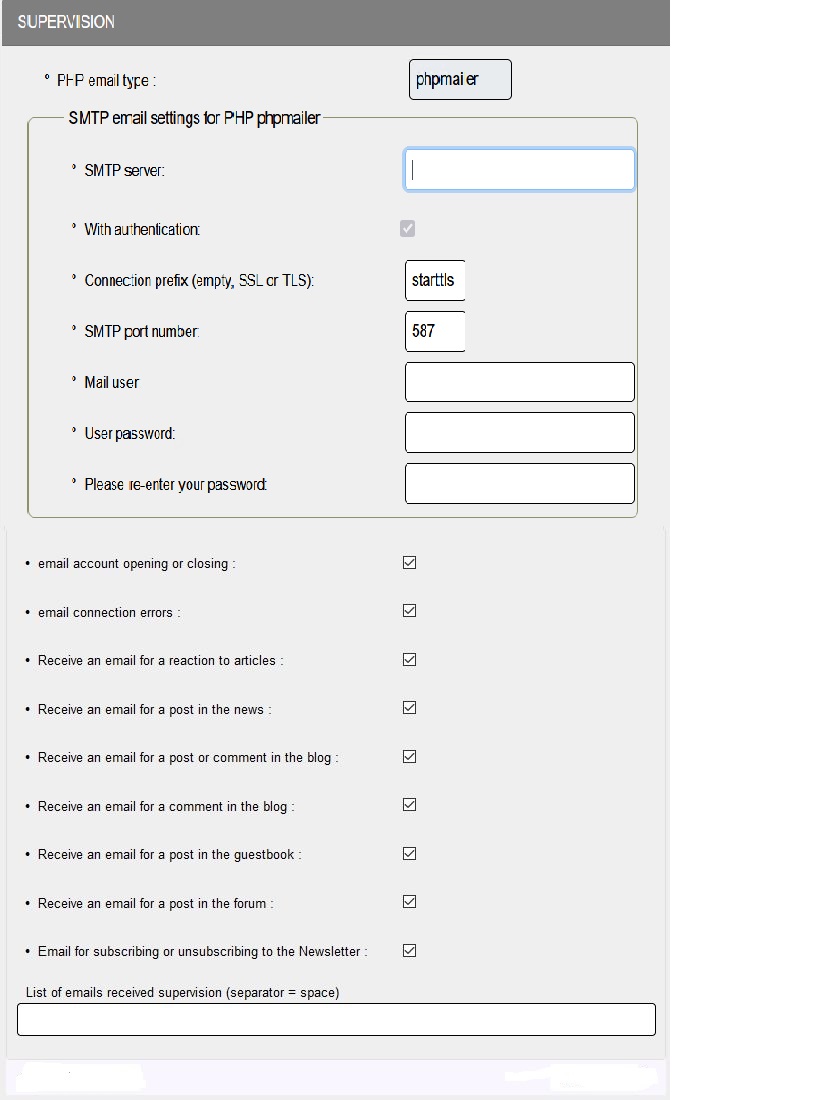
15. SUPERVISION AREA
You can receive email monitoring different events on your site :
visitor's contribution : Publishing a blog post, comment, reaction to an article, publication of a new post in the forum ...
But also, you can be notified of the registration of a new member, a registration for the newsletter, a value reached by the hit counter .
In short, be aware of everything that happens on your site.
Type e-mail: However, this service only works if your host allows it. Please contact your host to find out the SMTP parameters of your hosting. If you do not receive anything, it is because your host does not allow the sending of supervision e-mails from your site.
Attention: a domain name email is required for Webmaster Email in general configuration, PHP Email must be checked and PHPmailer Email is selected by default. All emails from the site will be authenticated by the server on the condition that the webmaster email is a domain name email.
Email: Tick the boxes to choose which event you want to be notified .
Email list receiving supervision: Then at the bottom of this part, you have to enter the webmaster's e-mail and you can add several e-mails of the people to whom this supervision is addressed. For example: guppy@guppy.cms admin@guppy.cms webmestre@mondomaine.org...
16. FIREWALL PROTECTION SYSTEM
Guppy features a firewall protection system
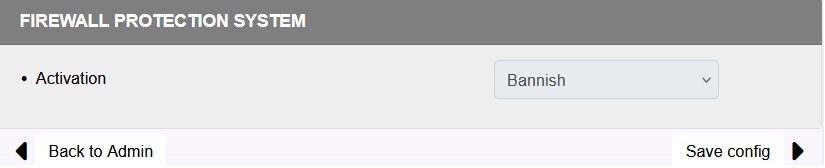
Do not forget to click the button "Save config" once you have completed your choice!


